ローカルの開発環境でDBサーバなどをVirtualBox上に構築する事が多いのですが、その際、ネットワークが変わってもクライアント側の設定を変更しなくて良いようにブリッジではなく、NATで構築します。最初、VMWareからVirtualBoxに移行した際に、NAT環境の構築に手間取ったのを覚えていたので、とりあえず、メモっておきます。
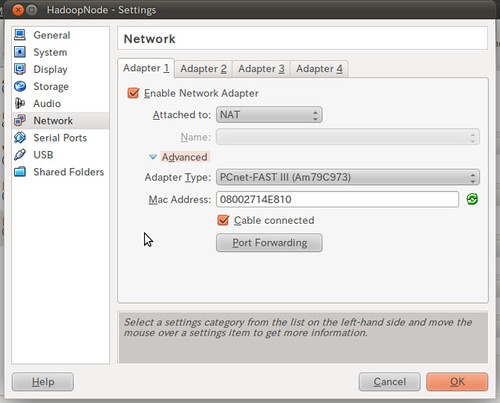
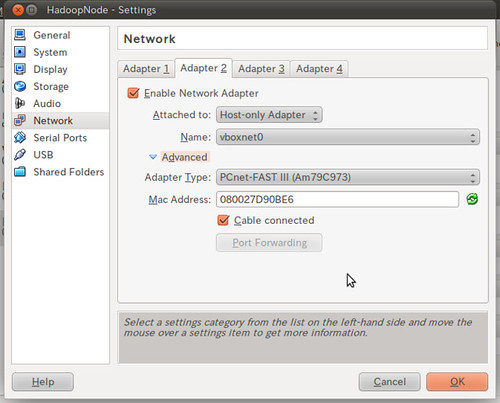
具体的には、VirtualBoxのNICでNATを選んだ場合、Guest -> Hostへの接続はOKでもHost -> Guestの接続は出来ません。これじゃSSHなどで接続できずに不便なので、NATとHost-only Adapterを併用して構築します。
Adapter1: NAT
Adapter2: Host-only Adapter
Ubuntuの場合、下記のように/etc/network/interfaceを編集します。
eth1はdhcp,staticに合わせて適当にコメントを解除してください。また、staticの場合はIPも環境で合わせてください。
# The loopback network interface auto lo iface lo inet loopback # The primary network interface auto eth0 iface eth0 inet dhcp # The secondary network interface auto eth1 # if use dhcp network #iface eth1 inet dhcp # if use static network #iface eth1 inet static #address 192.168.56.110 #netmask 255.255.255.0 |